

If you’re looking for all weapons in Pragmata, the important thing to know is that this game does not treat weapons like ordinary shooter pickups. Every new unlock changes how you approach combat, because only Primary weapons regenerate ammo and stay with you permanently. Everything else is temporary. Once an Attack, Tactical, or Defenseweapon runs dry, it breaks and disappears.
That single rule is what makes weapon unlocks matter so much. In a normal action game, a weapon guide is mostly a checklist. In Pragmata, it is also a progression guide. Some weapons make the early campaign far more manageable. Some become much more valuable once hacking grids get busier and more punishing. Others are tucked behind Shelter systems that are easy to overlook if you treat the game like a straight run from mission to mission.
This guide covers all 15 weapons in Pragmata, where to find them, which ones you should care about first, which ones are easiest to miss, and which tools make the biggest difference in bosses, crowded rooms, and late-game Red Zones.
How weapons work in Pragmata
Hugh’s best loadout is built around four categories:
| Weapon Type | What It Does |
|---|---|
| Primary | Permanent weapon with self-recharging ammo |
| Attack | Limited-use damage weapon |
| Tactical | Limited-use control or hacking support weapon |
| Defense | Limited-use survival or space-making tool |
Your Primary weapon is the foundation of every loadout because it is always available. Your Attack, Tactical, and Defense weapons are more situational and more valuable per use, because they are disposable.
As you progress, the Shelter becomes the center of that progression. It is where you unlock discovered weapons permanently, improve Hugh and Diana’s combat tools, and interact with systems like Cabin’s Stamp Club, which can reward you with weapons and other major upgrades. Later on, you can also unlock the ability to carry two Attack weapons and two Tactical weapons at once, which makes your loadout much more flexible.
That is when the game really opens up. Early on, you are mostly choosing one answer per slot. Later, you can start pairing a general-use tool with a more specialized option.
All 15 weapons in Pragmata and where to find them
Here is the full weapon list and each unlock location:
| Weapon | Type | First Available |
|---|---|---|
| Grip Gun | Primary | Starting weapon |
| Pulse Carbine | Primary | Sector 3: Terra Dome, Plant Factory |
| Shockwave Gun | Attack | Sector 1: Solar Panel Plants, Power Distribution Center |
| Charge Piercer | Attack | Sector 2: Mass Production Array, Side Alley |
| Photon Laser | Attack | Sector 3: Terra Dome, Soil Research |
| Homing Missiles | Attack | Sector 4: Lunum Mines, Mine Entrance |
| Jackhammer | Attack | Complete the game |
| Stasis Net | Tactical | Sector 1: Solar Panel Plants, Power Distribution Center |
| Riot Blaster | Tactical | Sector 2: Mass Production Array, Shopping District |
| Sticky Bombs | Tactical | Sector 3: Terra Dome, Eco Modeling Lab |
| Code Generator | Tactical | Specialist Stamp Board, triple bingo |
| Hacking Mines | Tactical | Director Stamp Board, triple bingo |
| Decoy Generator | Defense | Sector 2: Mass Production Array, Lim Recycling Facility |
| Impact Barrier | Defense | Sector 4: Lunum Mines, Crane Operation Yard |
| Drone Hive | Defense | Associate Stamp Board, triple bingo |
That list already highlights one of the game’s most important patterns. Most weapons come through normal sector progression, but Code Generator, Hacking Mines, and Drone Hive are tied to Cabin’s Stamp Club, while Jackhammer sits behind game completion. So if you ignore the Shelter’s long-term reward systems, you can finish the campaign without ever collecting the full arsenal.
Best weapons to prioritize first
Not every weapon matters equally when you get it. Some unlocks change the game immediately, while others only become valuable in more specific situations.
Shockwave Gun
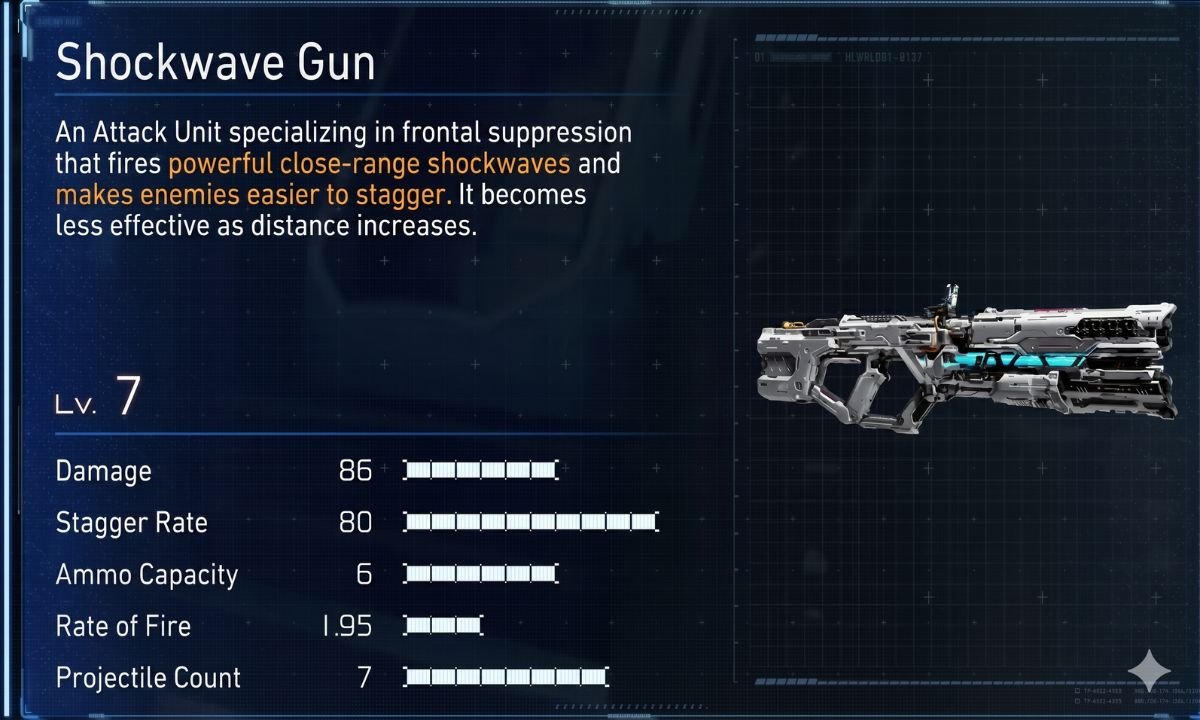
The first weapon most players should care about is the Shockwave Gun. It arrives early, hits hard, staggers reliably, and remains useful long after more options start opening up. It is simple, effective, and works in both standard encounters and boss damage windows.
More importantly, it solves a real early-game problem: limited offensive power under pressure. When the game is still teaching you how to manage movement, hacking, and enemy timing at once, a weapon that gives you strong, immediate payoff matters a lot.
Stasis Net
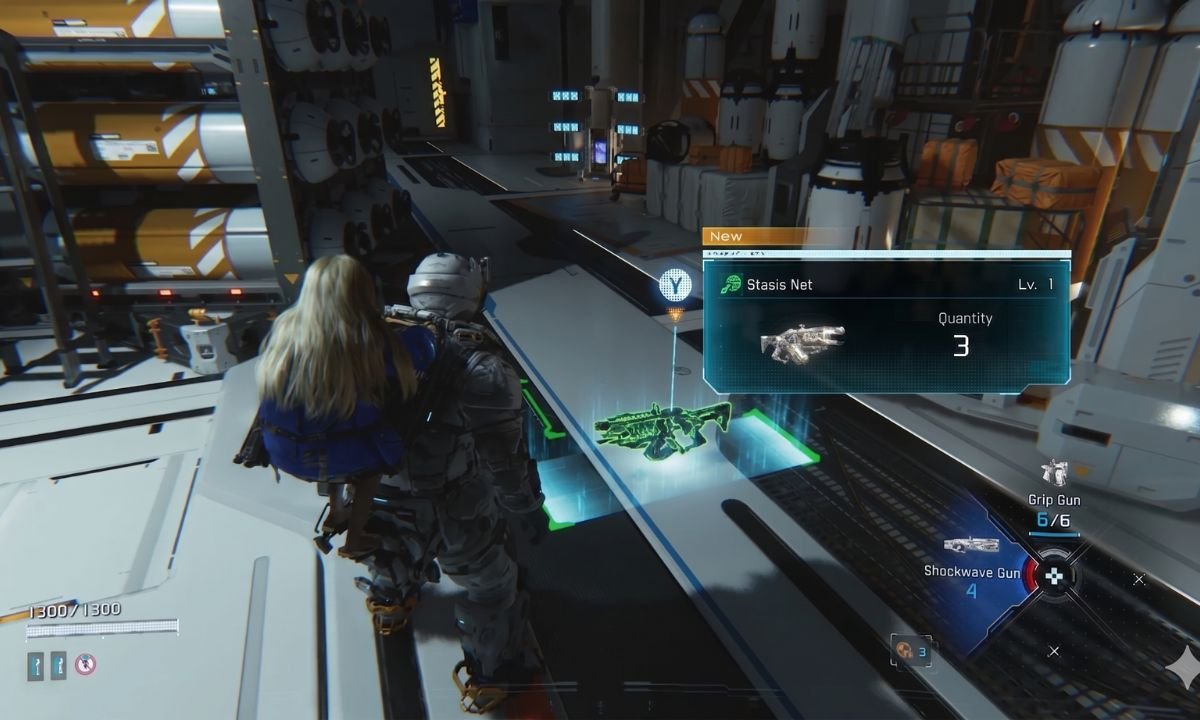
The Stasis Net is the other early standout. It is not flashy, but it makes the game safer. Freezing one enemy while you deal with another gives you breathing room when fights are getting messy, and that kind of control is worth more than raw damage in many early encounters.
Grip Gun and Pulse Carbine
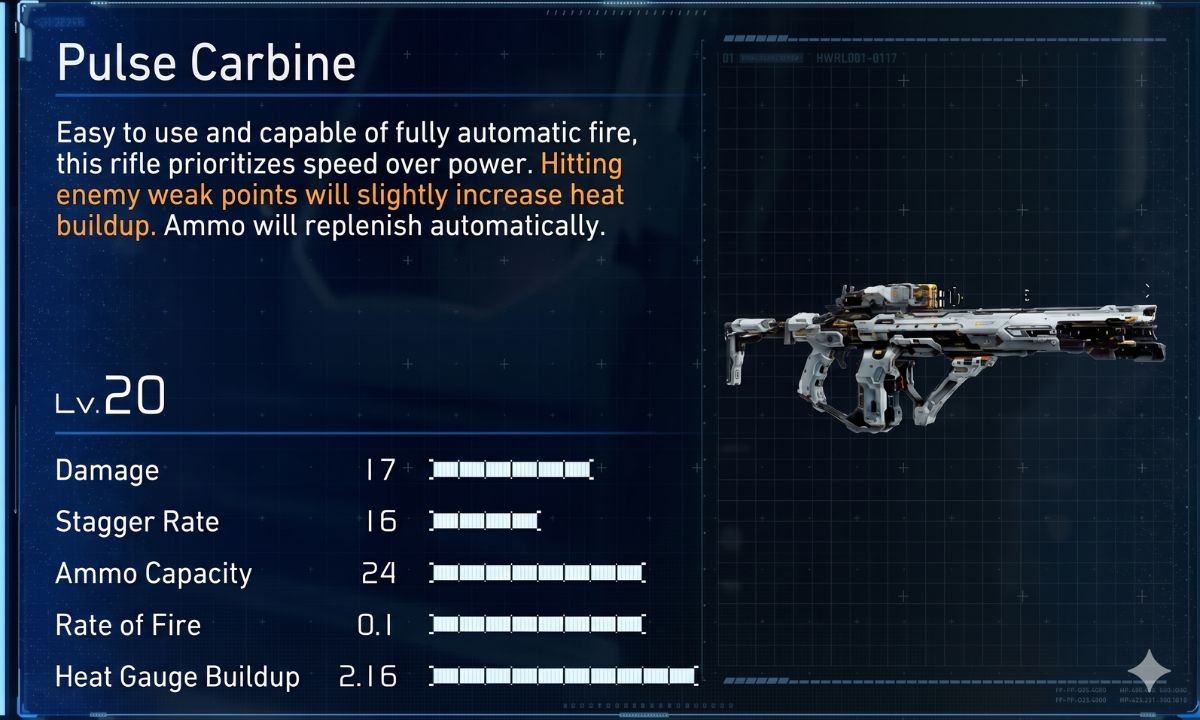
Your Grip Gun matters because it never leaves your loadout. That alone makes it a sensible place to invest some upgrade resources. Later, the Pulse Carbine becomes a meaningful second Primary option once you reach Sector 3, especially if you prefer sustained fire over the Grip Gun’s simpler pace.
That said, do not dump everything into Primary upgrades and neglect the rest of your kit. The best approach is balance. Your Primary weapon is your constant fallback, but hacking support, health, and situational weapons often make a bigger difference in whether you survive difficult encounters.
The best early priorities overall
For most players, the best first priorities are:
- Shockwave Gun, because it is strong, early, and easy to use well
- Stasis Net, because it immediately lowers combat pressure
- Hacking support, because hacking is central to how you open enemies up
- Health and survivability, because Pragmata punishes sloppy defensive play
Which weapons are easiest to miss
Some weapons are harder to miss than others. The ones tied to story progression usually show up naturally if you explore properly. The weapons most players are likely to miss or delay are the ones hidden behind side systems or post-game progression.
Code Generator, Hacking Mines, and Drone Hive
These are the three most obvious missable weapons because they are tied to Cabin’s Stamp Club, not normal mission pickups.
That matters for two reasons. First, Cabin Coins are limited, so poor choices on Stamp Boards can slow your access to better rewards. Second, some board rewards are hidden until you reveal them, which makes it easy to spend carelessly if you are not paying attention.
If you treat the Shelter like downtime between missions instead of part of the progression loop, these are the weapons you are most likely to miss.
Jackhammer
The fourth easy-to-miss weapon is Jackhammer, but for a different reason. It is not hidden in a sector or tucked behind a side route. It is a post-game unlock, which means first-run players should not waste time searching for it during the campaign.
Why this matters
The broader point is that Pragmata does not put every important reward directly in front of you. Some of the best or rarest weapons are tied to long-term Shelter engagement, not just exploration. If your goal is to complete the arsenal, you need to pay attention to both mission progress and Cabin’s reward systems.
Best weapons by situation
The best weapon in Pragmata depends on the problem you are trying to solve. A strong all-purpose loadout is useful, but the game is better understood as a series of combat situations that reward different tools.
Best weapons for a standard first playthrough
For a first run, the safest general setup is built around:
- Grip Gun or Pulse Carbine
- Shockwave Gun
- Stasis Net
- Decoy Generator
Later, Sticky Bombs become worth rotating into that setup once Sector 3 opens up.
This is a good first-playthrough core because it covers the basics without overcomplicating things. Your Primary gives you constant damage. Shockwave Gun gives you strong burst. Stasis Net helps control the room. Decoy Generator buys you time when things start collapsing.
That combination is not the only workable loadout, but it is one of the easiest to trust through most of the campaign.
Best weapons for bosses
Boss fights change the rules. You get fewer clean damage windows, and every wasted shot hurts more.
Charge Piercer
The Charge Piercer becomes much more valuable in boss fights than in ordinary room clearing. It works well in narrow attack windows and rewards patience more than panic. If a boss forces you to wait for the right moment to punish, Charge Piercer fits that rhythm better than many other Attack weapons.
Sticky Bombs
Sticky Bombs matter in boss fights because their real value is not direct damage. They help simplify hacking grids, which reduces how long you stay exposed while trying to make the boss vulnerable. In fights where pressure never really stops, that can be a huge difference-maker.
Homing Missiles
Homing Missiles are not a universal answer, but they become practical when a boss is highly mobile or spends a lot of time airborne. In those situations, they remove some of the frustration that comes from trying to manually track hard-to-hit targets.
Best weapons for crowd control
When a room fills up with enemies, the priority shifts away from perfect single-target damage and toward keeping the fight under control.
Stasis Net
The Stasis Net remains one of the cleanest crowd-control tools in the game. Freeze one target, deal with another, then circle back before the window closes. It is a straightforward loop, but it works.
Riot Blaster
Once you unlock the second Tactical slot, Riot Blaster becomes more interesting. It is not as universally useful as Stasis Net, but it helps in situations where enemies cluster tightly enough that single-target tools start to feel inefficient.
Best weapons for late-game and Red Zones
Late-game encounters and Red Zones ask more from your loadout because they combine tighter margins, stronger enemies, and more punishment for mistakes.
Code Generator
Code Generator becomes a serious late-game tool because it improves hacking performance rather than just raw damage. In difficult rooms, that can be more important than another offensive option. It is one of the clearest examples of a weapon whose value grows with the game’s complexity.
Sticky Bombs
Sticky Bombs age very well into the late game because enemy hacking grids become more cluttered and more punishing. Anything that makes those grids cleaner becomes more valuable as the campaign goes on.
Photon Laser and Charge Piercer
Once your second Attack slot is open, Photon Laser and Charge Piercer make strong situational pairings. Photon Laser helps at range, while Charge Piercer remains useful when you want high burst in tight windows.
Stamp Board weapons explained clearly
Cabin’s Stamp Club is easy to underestimate because it initially looks like a side activity. It is not. It is one of the game’s most important long-term progression systems.
The basic structure is simple. You earn Cabin Coins, spend them on bingo-style boards in the Shelter, and unlock rewards as you fill in rows and hit bingo milestones. Some of those rewards are cosmetic or utility-based, but some are major combat tools.
For weapons, the key Stamp Board rewards are:
- Drone Hive — Associate Board, triple bingo
- Code Generator — Specialist Board, triple bingo
- Hacking Mines — Director Board, triple bingo
That means two things.
First, if you ignore Stamp Boards, you are not just ignoring side content. You are skipping real combat options.
Second, because Cabin Coins are limited and many rewards are hidden until revealed, you should not spend carelessly. The Stamp Club is part of combat progression, not just collectible padding.
The most important takeaway
If there is one thing worth remembering, it is this: Pragmata is not really about collecting a giant pile of weapons and calling it a day. It is about understanding why each weapon exists and what problem it helps solve.
For most players, the best early priorities are Shockwave Gun, Stasis Net, and balanced upgrades to hacking, health, and your Primary weapon. The easiest weapons to miss are the three hidden behind Cabin’s Stamp Club, plus the post-game Jackhammer. The safest first-playthrough setup revolves around Shockwave Gun, Stasis Net or Sticky Bombs, and Decoy Generator, while Charge Piercer, Homing Missiles, and Code Generator become more valuable when bosses or late-game challenge rooms demand more specialized answers.
That is what makes the arsenal in Pragmata interesting. The full weapon list is not just there for completionists. It maps the game’s learning curve: early survival, cleaner control, stronger hacking support, and finally late-game tools that reward players who actually engage with the Shelter instead of treating it like dead time.